
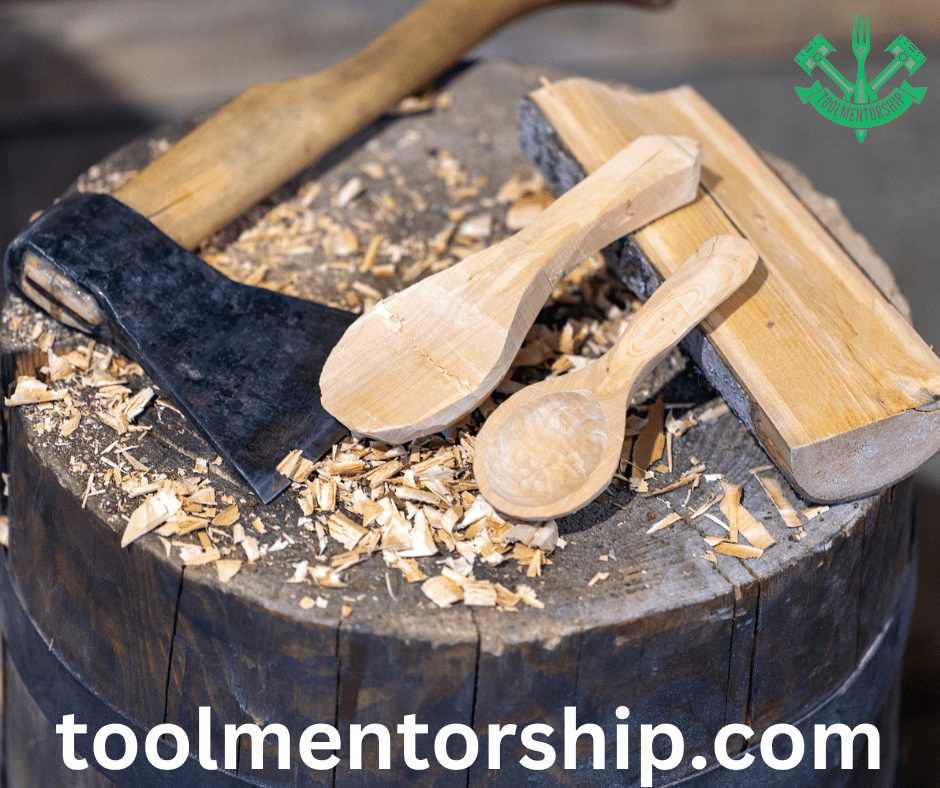
In the world of woodworking and outdoor adventures, having a reliable axe is essential. But what good is an axe without a sturdy handle? The handle is the backbone of an axe, responsible for delivering the power and precision necessary for tackling even the toughest tasks. Whether you’re a seasoned woodworker or an adventurous outdoorsman, learning how to make an axe handle is a valuable skill that will serve you well. In this comprehensive guide, we’ll delve into the art of crafting a durable and efficient axe handle, exploring every step from selecting the right materials to applying the final finishing touches.
Contents
Choosing the Right Wood
Understanding Wood Properties
When it comes to selecting the right wood for an axe handle, it’s crucial to consider the unique properties that contribute to its strength, durability, and shock absorption. Here are some key factors to keep in mind:
- Density: Denser woods are generally stronger and more resistant to impact, making them ideal for axe handles. Some popular choices include hickory, ash, and white oak.
- Grain Orientation: Straight-grained woods are preferred for axe handles as they are less likely to split or break under stress.
- Flexibility: While rigidity is important, some flexibility is also desirable to prevent the handle from shattering upon impact. Woods like hickory and ash offer a good balance of strength and flexibility.
Popular Wood Choices
Here are some of the most commonly used woods for axe handles and their respective characteristics:
- Hickory: Known for its exceptional strength, shock resistance, and flexibility, hickory is one of the most popular choices for axe handles. It has a straight grain and a dense structure that can withstand heavy use.
- Ash: With its combination of strength, elasticity, and lightweight nature, ash is another excellent option for axe handles. It has a relatively straight grain and is less likely to split or break under impact.
- White Oak: Renowned for its durability and resistance to rot, white oak is a reliable choice for axe handles. Its dense and tight grain structure makes it highly resilient to impact and wear.
- Maple: While not as commonly used as hickory or ash, maple is a viable option for axe handles. It offers a good balance of strength and shock absorption, making it a suitable choice for moderate use.
Sourcing and Preparing the Wood
Once you’ve decided on the wood species, it’s time to source your material. You can purchase pre-cut blanks from a woodworking supplier or even use a fallen tree branch if you’re feeling adventurous. Regardless of the source, ensure that the wood is free from defects, such as knots, cracks, or rot.
If you’re starting with a larger piece of wood, you’ll need to prepare it by cutting it to the desired length and squaring off the ends. A bandsaw or a handsaw can be used for this task. It’s also a good idea to rough out the shape of the handle using a drawknife or a spokeshave to remove any excess material.
Shaping and Fitting the Handle
Determining the Proper Handle Length
The length of the axe handle plays a crucial role in its overall effectiveness and ease of use. Generally, a longer handle offers more leverage and power, but it can also be more challenging to control. A shorter handle, on the other hand, provides better control but sacrifices some power.
The optimal length of an axe handle typically ranges from 24 to 36 inches, depending on the intended use and the user’s height and strength. For general-purpose axes, a handle length of 28 to 32 inches is often recommended.
Shaping the Handle
Once you’ve determined the desired length, it’s time to shape the handle. This process can be done by hand using traditional tools like a drawknife, spokeshave, and rasps, or with the aid of power tools such as a belt sander or a lathe.
When shaping the handle, it’s essential to create a comfortable and secure grip. This typically involves tapering the handle from the middle towards both ends, creating a slight swell or bulge in the middle for a firm grip. The shape should also accommodate the natural curve of the user’s hand for optimal comfort and control.
Fitting the Handle to the Axe Head
After shaping the handle, the next step is to fit it to the axe head. This process involves creating a kerf or slot in the handle that matches the shape and size of the axe head’s eye (the hole where the handle is inserted).
To create the kerf, you can use a variety of tools, such as a chisel, a mortising machine, or a dedicated kerf-cutting tool. The kerf should be slightly wider than the eye of the axe head to allow for a tight fit and ensure that the handle doesn’t loosen over time.
Once the kerf is created, you can insert the axe head into the handle and secure it in place using a wedge or a metal wedge. The wedge helps to tighten the fit and prevent the handle from slipping or rotating within the eye.
Finishing and Maintenance
Sanding and Smoothing
After the handle is securely fitted to the axe head, the next step is to smooth and refine the surface. This process typically involves sanding the handle using progressively finer grits of sandpaper or a sanding block.
Start with a coarse grit (e.g., 80-100 grit) to remove any rough spots or tool marks, and gradually move to finer grits (e.g., 120-220 grit) to achieve a smooth, silky finish. Pay special attention to the areas around the kerf and the grip portion, ensuring a comfortable and consistent feel.
Applying a Finish
To protect the handle from moisture, dirt, and general wear and tear, it’s essential to apply a finish. There are several options to choose from, each offering its own benefits and characteristics:
- Linseed Oil: A natural oil finish that penetrates deep into the wood, providing a beautiful, low-sheen appearance. Linseed oil is easy to apply and offers good moisture resistance.
- Tung Oil: Similar to linseed oil, tung oil is a durable and water-resistant finish that enhances the natural beauty of the wood. It dries harder than linseed oil, providing better protection against wear.
- Polyurethane: A synthetic finish that offers excellent durability and moisture resistance. Polyurethane can be applied in various sheens, from a matte to a high-gloss finish.
- Lacquer: A fast-drying and durable finish that provides a high-gloss appearance. Lacquer is resistant to moisture, heat, and chemicals, making it a great choice for axe handles that will see heavy use.
Regardless of the finish you choose, be sure to follow the manufacturer’s instructions for proper application and drying times.
Maintaining Your Axe Handle
Proper maintenance is key to ensuring the longevity and performance of your axe handle. Here are some tips to keep in mind:
- Store Properly: When not in use, store your axe in a dry, cool place, away from direct sunlight or moisture.
- Clean Regularly: After each use, wipe down the handle with a clean, dry cloth to remove any dirt, sweat, or debris.
- Re-apply Finish: Over time, the finish on your axe handle may wear down, leaving the wood vulnerable to moisture and rot. Periodically re-apply the finish to maintain optimal protection.
- Inspect for Damage: Regularly inspect the handle for any cracks, splits, or other signs of damage. If you notice any issues, it’s best to replace the handle promptly to avoid potential safety hazards.
By following these maintenance guidelines, your handcrafted axe handle will serve you well for years to come, whether you’re splitting logs or exploring the great outdoors.
Section 4: Tools and Materials Needed
To ensure a successful axe handle-making project, it’s essential to have the right tools and materials on hand. Here’s a list of what you’ll need:
Tools:
- Drawknife or spokeshave
- Rasps or files
- Sandpaper (various grits)
- Sanding block
- Chisel or mortising tool
- Mallet or hammer
- Clamps (optional)
- Lathe (optional)
- Belt sander or random orbit sander (optional)
Materials:
- Wood blank or log (hickory, ash, white oak, or your
- Axe head
- Wedge material (wood or metal)
- Finishing materials (linseed oil, tung oil, polyurethane, lacquer, etc.)
Step-by-Step Instructions
Now that you have a solid understanding of the materials and tools required, let’s dive into the step-by-step process of crafting your own axe handle.
Step 1: Prepare the Wood Blank
- Start with a straight-grained wood blank or log, free from knots, cracks, or other defects.
- Measure and mark the desired length of the handle, typically between 24 to 36 inches.
- Use a saw (handsaw or bandsaw) to cut the blank to the desired length.
- Square off the ends of the blank using a saw or a handplane.
Step 2: Rough Out the Handle Shape
- Using a drawknife or a spokeshave, begin shaping the handle by removing excess material and creating a rough taper from the center towards both ends.
- Aim for a slight swell or bulge in the middle section for a comfortable grip.
- Periodically check the handle’s balance and adjust the shape as needed.
Step 3: Create the Kerf or Slot
- Measure the diameter of the axe head’s eye (the hole where the handle will be inserted).
- Using a chisel, mortising machine, or dedicated kerf-cutting tool, create a kerf or slot in one end of the handle that matches the size and shape of the axe head’s eye.
- Ensure the kerf is slightly wider than the eye to allow for a tight fit.
Step 4: Fit the Axe Head and Wedge
- Insert the axe head into the kerf, ensuring a snug fit.
- Use a mallet or hammer to gently tap the axe head into place, if necessary.
- Cut a wooden or metal wedge to the appropriate size and shape.
- Insert the wedge into the remaining gap in the kerf, tapping it in with a mallet to secure the axe head in place.
Step 5: Refine the Handle Shape
- Using rasps, files, and progressively finer grits of sandpaper (80-120 grit), refine the handle’s shape and smooth out any rough spots or tool marks.
- Pay special attention to the grip area, ensuring a comfortable and consistent feel.
- For a more polished look, you can use a lathe or a belt sander to further refine the shape and achieve a smooth, consistent finish.
Step 6: Apply the Finish
- Choose your desired finish (e.g., linseed oil, tung oil, polyurethane, or lacquer) based on your preferences and the intended use of the axe.
- Thoroughly clean and prepare the handle surface according to the finish manufacturer’s instructions.
- Apply the finish in thin, even coats, allowing each coat to dry completely before applying the next.
- Follow the recommended number of coats and drying times for optimal protection and durability.
Step 7: Final Touches and Maintenance
- Once the finish has fully cured, buff the handle with a clean cloth to bring out the natural shine and luster of the wood.
- Regularly inspect the handle for any signs of wear, cracks, or damage, and re-apply the finish as needed.
- Store the axe in a dry, cool place when not in use, and always handle it with care to ensure its longevity.
By following these step-by-step instructions, you’ll have a beautifully crafted, personalized axe handle that not only looks great but also performs exceptionally well for all your woodworking or outdoor adventures.
Supporting Data and Resources
To further reinforce the importance of selecting the right wood for your axe handle, let’s explore some quantitative data on the properties of commonly used wood species.
Comparison of Wood Properties
| Wood Species | Density (lb/ft³) | Bending Strength (PSI) | Compression Strength (PSI) | Shock Resistance |
|---|---|---|---|---|
| Hickory | 50-58 | 16,000 | 8,300 | Excellent |
| Ash | 41-51 | 14,000 | 6,900 | Very Good |
| White Oak | 46-56 | 12,000 | 7,000 | Excellent |
| Maple | 43-47 | 15,000 | 7,800 | Good |
This table compares the density, bending strength, compression strength, and shock resistance of four popular wood species used for axe handles. As you can see, hickory stands out with its exceptional density, bending strength, and shock resistance, making it an ideal choice for heavy-duty applications.
While the data presented is informative, it’s important to note that the actual performance of an axe handle can also be influenced by factors such as grain orientation, moisture content, and the quality of the woodworking process.
External Resources and Further Reading
To further enhance your knowledge and skills in axe handle making, here are some valuable external resources and recommended reading materials:
- “The Woodwright’s Guide to Working Green Wood” by Roy Underhill (Book)
- “The Ax Book” by Dudley Cook and Gordon Lohr (Book)
- “Traditional Woodworker” (Magazine)
- “Woodworking Magazine” (Magazine)
- “The Axe Book” by Jeff Gottlieb (Online Resource)
- “The Art of Handle Making” by Ray Townsend (Online Article)
- “How to Make an Axe Handle” by Lie-Nielsen Toolworks (Video Tutorial)
These resources offer in-depth information, techniques, and expert insights on axe handle making, as well as woodworking in general. Explore them to deepen your understanding and improve your skills in this fascinating craft.
FAQs
What is the best wood for making an axe handle?
While there are several suitable options, hickory is widely considered the best wood for making axe handles due to its exceptional strength, shock resistance, and flexibility. Other excellent choices include ash and white oak.
How do I prevent the handle from coming loose?
To ensure a secure fit and prevent the handle from coming loose, it’s crucial to create a kerf or slot in the handle that matches the size and shape of the axe head’s eye. Additionally, use a wedge (wooden or metal) to tighten the fit and prevent the handle from rotating or slipping out.
Can I use a power tool to shape the handle?
Absolutely! While traditional hand tools like drawknives and spokeshaves are commonly used, you can also utilize power tools such as a lathe, belt sander, or random orbit sander to shape and refine the handle more efficiently. Just be sure to follow proper safety guidelines when using power tools.
How often should I re-apply the finish?
The frequency of re-applying the finish depends on the type of finish used and the amount of use and exposure the axe handle experiences. As a general rule, inspect the handle regularly for signs of wear or dullness, and re-apply the finish as needed to maintain optimal protection and appearance.
Can I use a synthetic or composite material instead of wood?
While wood is the traditional and preferred material for axe handles due to its strength, flexibility, and shock absorption properties, some modern axe manufacturers have experimented with synthetic or composite materials. However, for a truly authentic and customized experience, wood remains the material of choice for handcrafted axe handles.
Conclusion
Crafting your own axe handle is a rewarding and satisfying experience that combines practicality with artistic expression. By following the step-by-step instructions outlined in this comprehensive guide, you can create a durable, efficient, and personalized tool that will serve you well for years to come.
Remember, the key to a successful axe handle lies in selecting the right wood, carefully shaping and fitting the handle, and applying a protective finish to enhance its longevity. With patience, attention to detail, and a dedication to quality craftsmanship, you’ll be able to wield your handmade axe with pride, whether you’re tackling woodworking projects or embarking on outdoor adventures.
So, gather your tools, choose your favorite wood species, and let your creativity shine as you embark on the journey of making an axe handle that truly reflects your own style and skill. The sense of accomplishment and the connection to the natural world that comes with this craft are truly unmatched.